Guide on how to build stock screeners
Creating and saving custom stock screeners: a comprehensive guide.
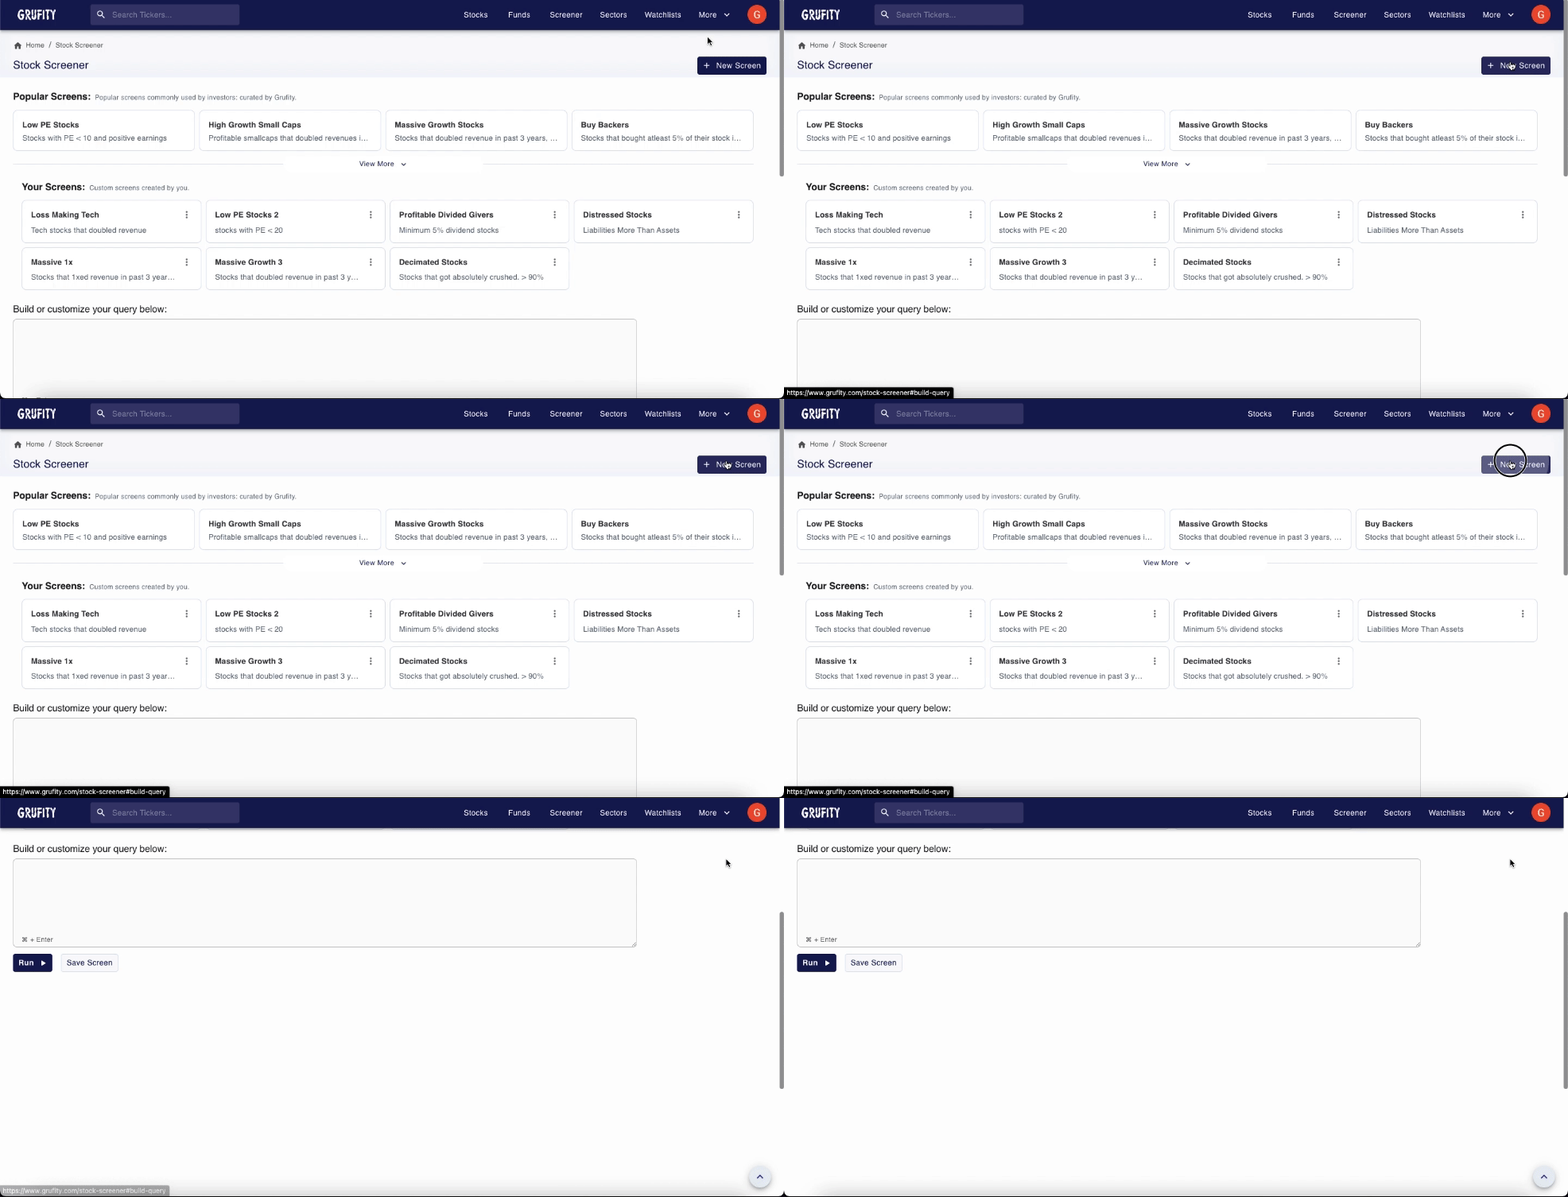
Step 1 - New Screen:
To make your own screen, start by clicking on the "+" icon labeled "New Screen" in the top right corner.
Step 2 - Customize Query:
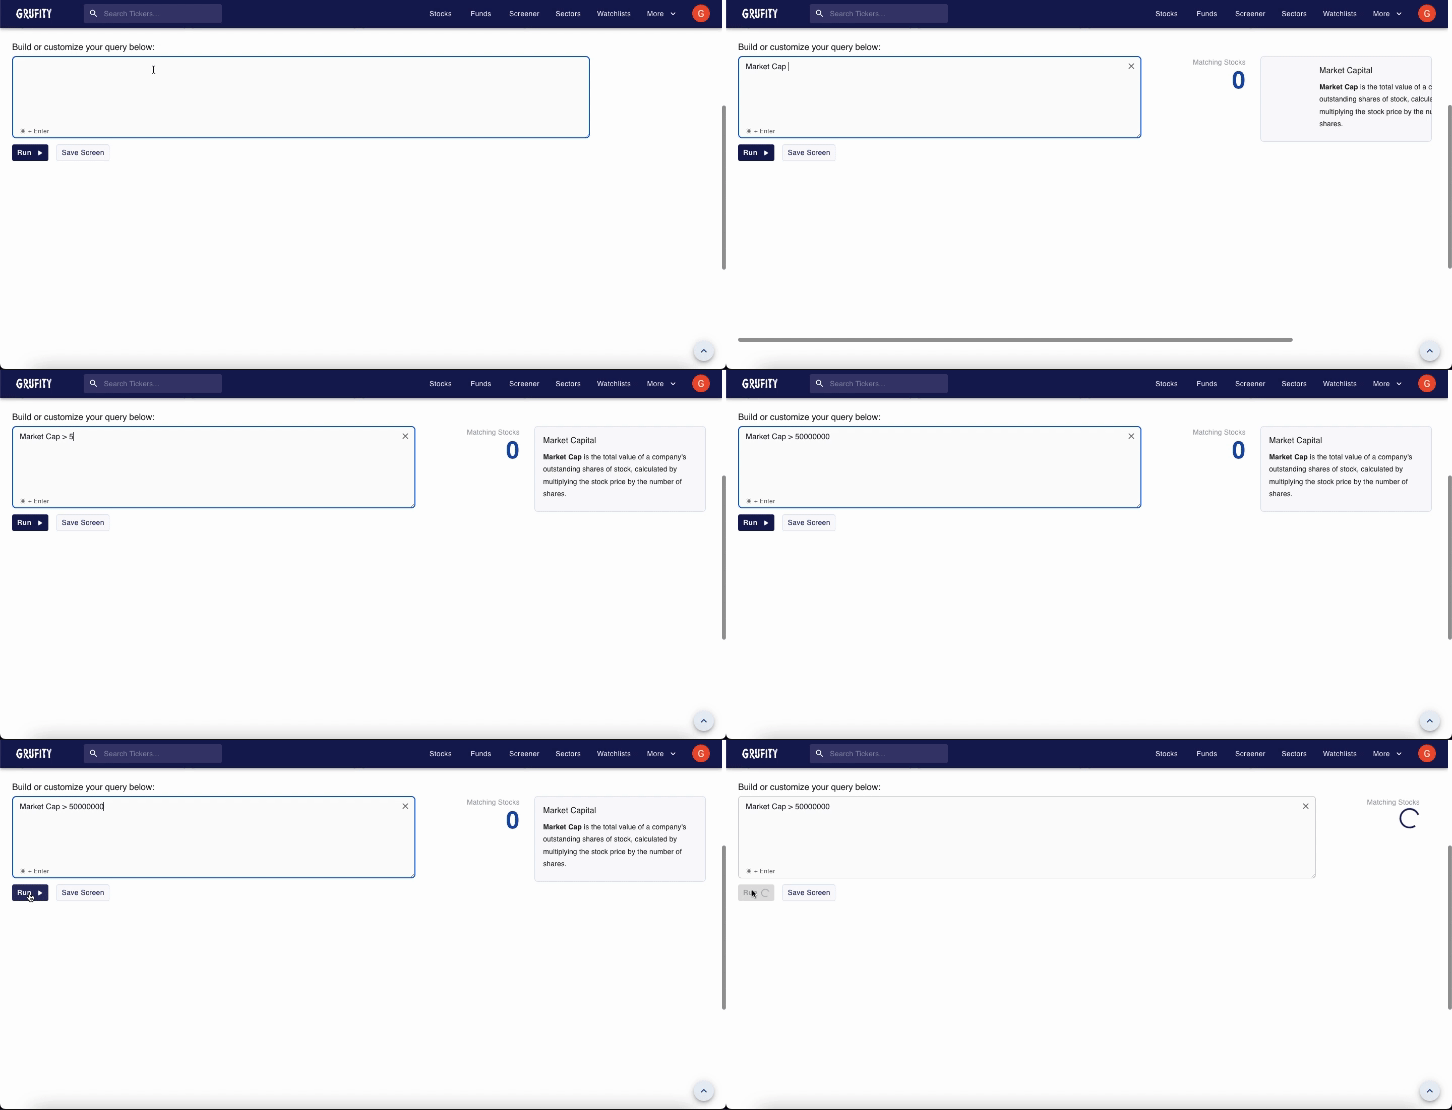
Customize your query or establish your own criteria based on your needs. Feel free to formulate any equation that suits your preferences.
Tip:
Utilize any existing screen as a reference and adjust its query to your liking. You can explore our preset screens at: www.grufity.com/stock-screener/
Step 3 - Save Query:
Now, simply save your query to avoid the need for rebuilding it. This includes saving the table columns and their order, ensuring efficient time management.
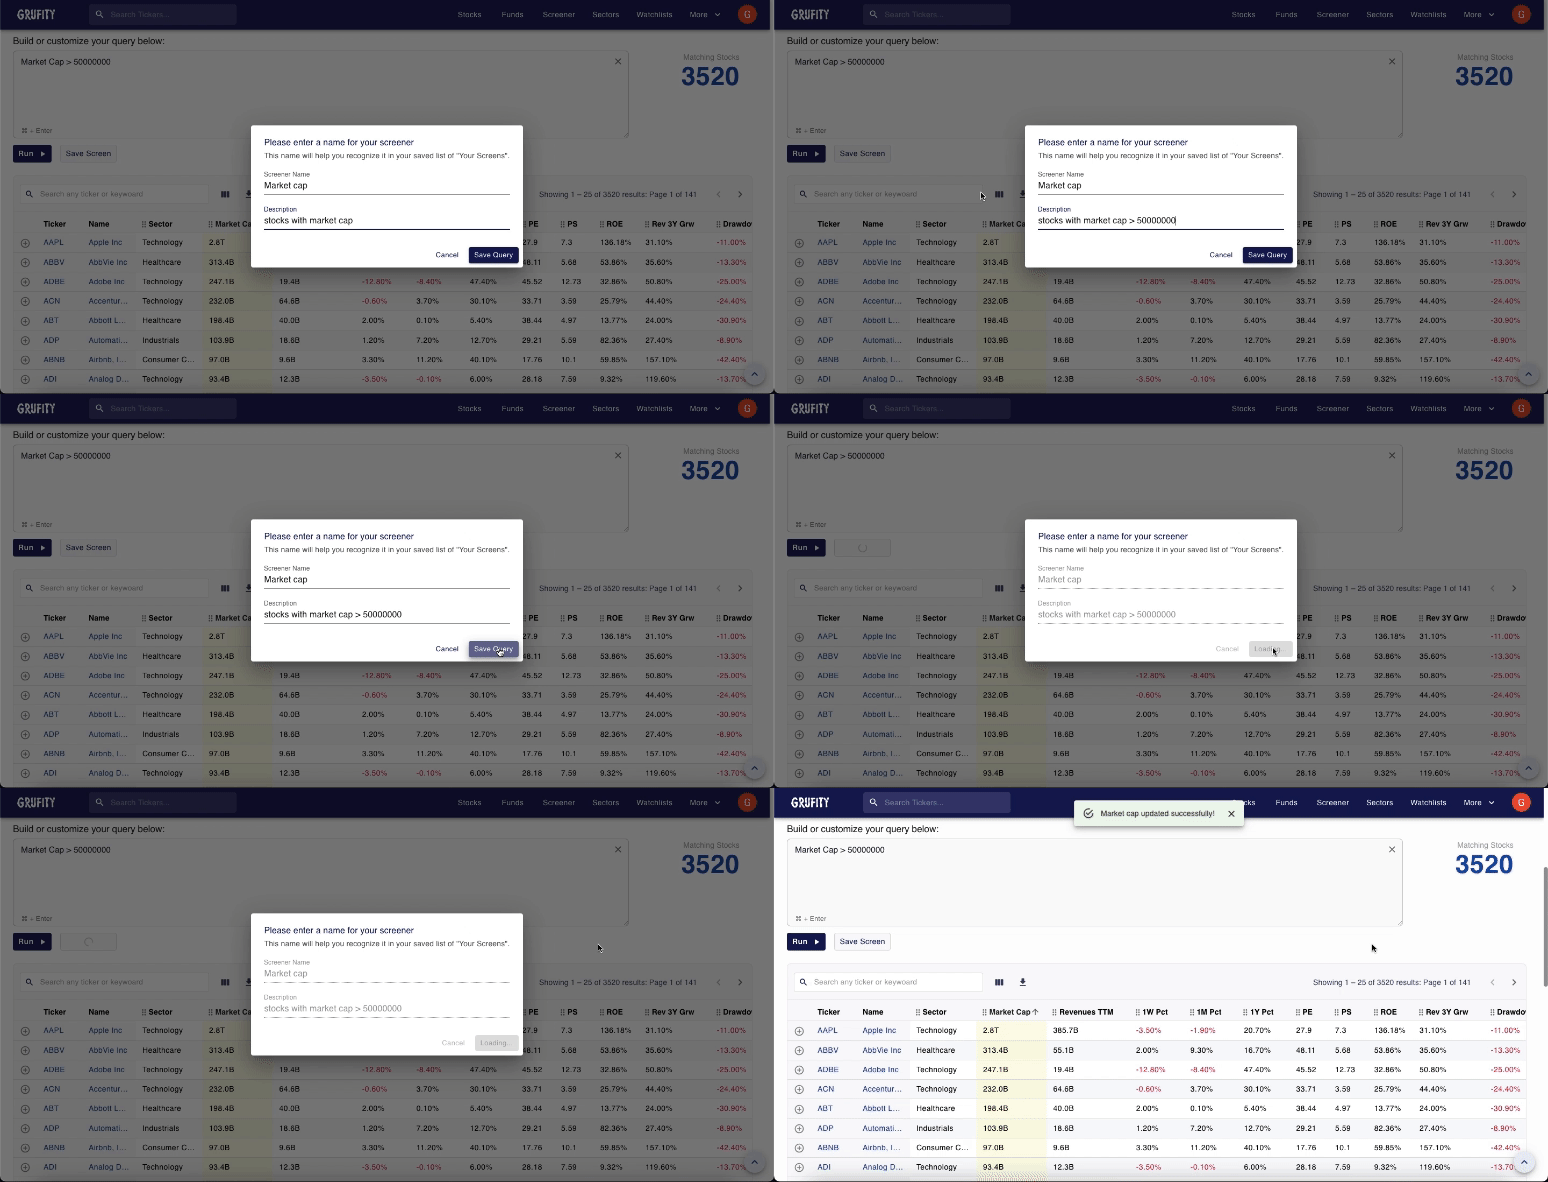
To save your screen, click on the "Save Screen" button located below the query builder, next to the run button.
Upon clicking the "Save Screen" button, a popup will appear, allowing you to name the screen. Additionally, you can provide a description to quickly distinguish the screen from your list later on.
Note: Remember, the screens you save are private and not visible to the public.
Step 4 - Add to Watchlist:
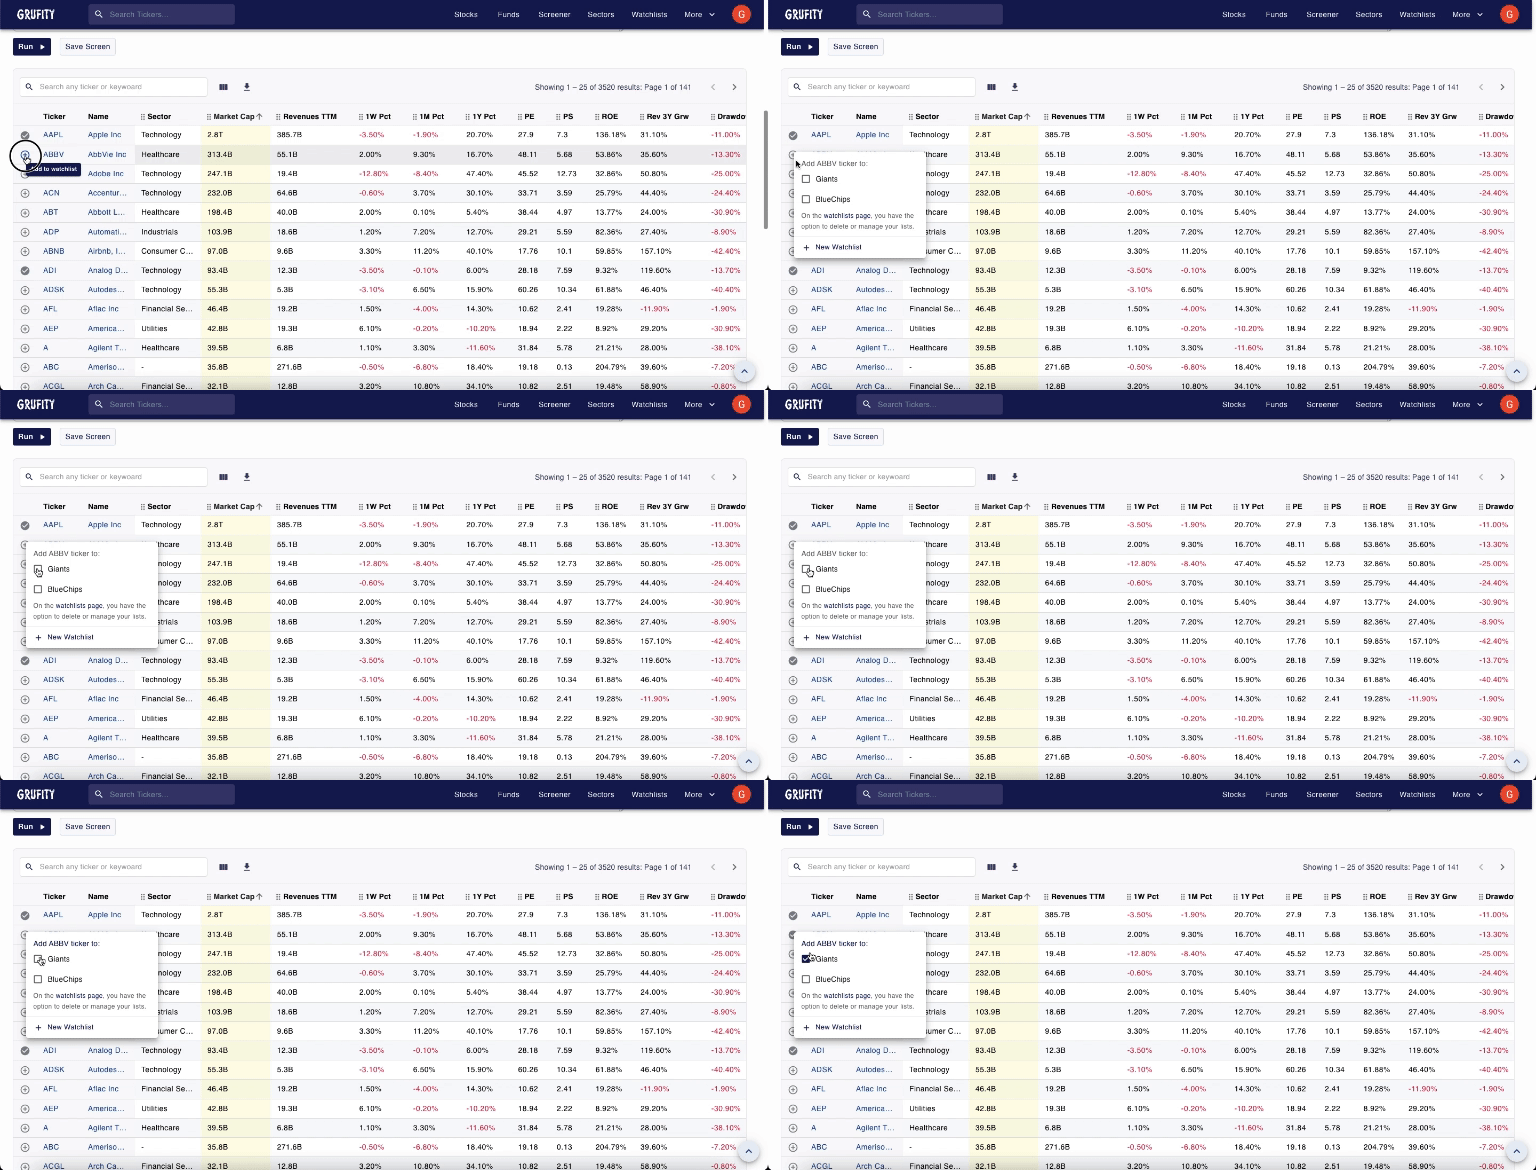
Furthermore, you have the option to save filtered stocks to your watchlist and monitor them closely.
To save a ticker to your watchlist, simply click on the plus button associated with each ticker.
Upon clicking, a list of your previous watchlists will appear, allowing you to select and add them to your desired watchlist.
Alternatively, if you wish to create a new watchlist, you can do so by clicking on "+ New Watchlist" in the popup window.
Note: If you haven't created any watchlists, there's a default watchlist named "My Watchlist" available where you can add your tickers.
You can access and view all your watchlists at: www.grufity.com/watchlists/
Step 5 - Manage Table Columns:
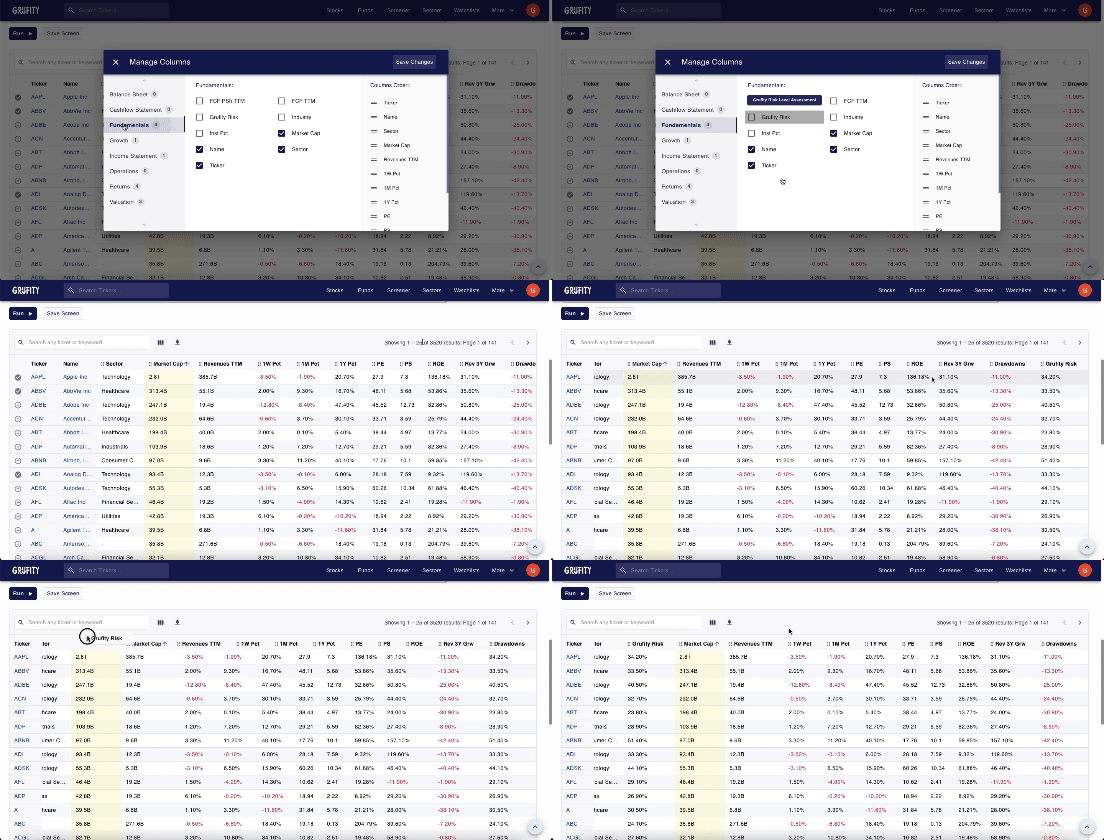
You can manage the table columns by clicking on the "" button, which will prompt a popup displaying all available metrics that you can add to your filtered screener.
There are approximately 90 metrics to choose from. After selecting the desired metrics from the popup, click on the "Save Changes" button located at the top right corner within the popup to confirm your selections.
Once saved, you will have all your chosen metrics displayed.
Tip: To arrange the table columns as per your preference, simply drag and drop them to the desired position. You can also rearrange columns within the popup by dragging them up and down to arrange them accordingly.
Step 6 - Download:
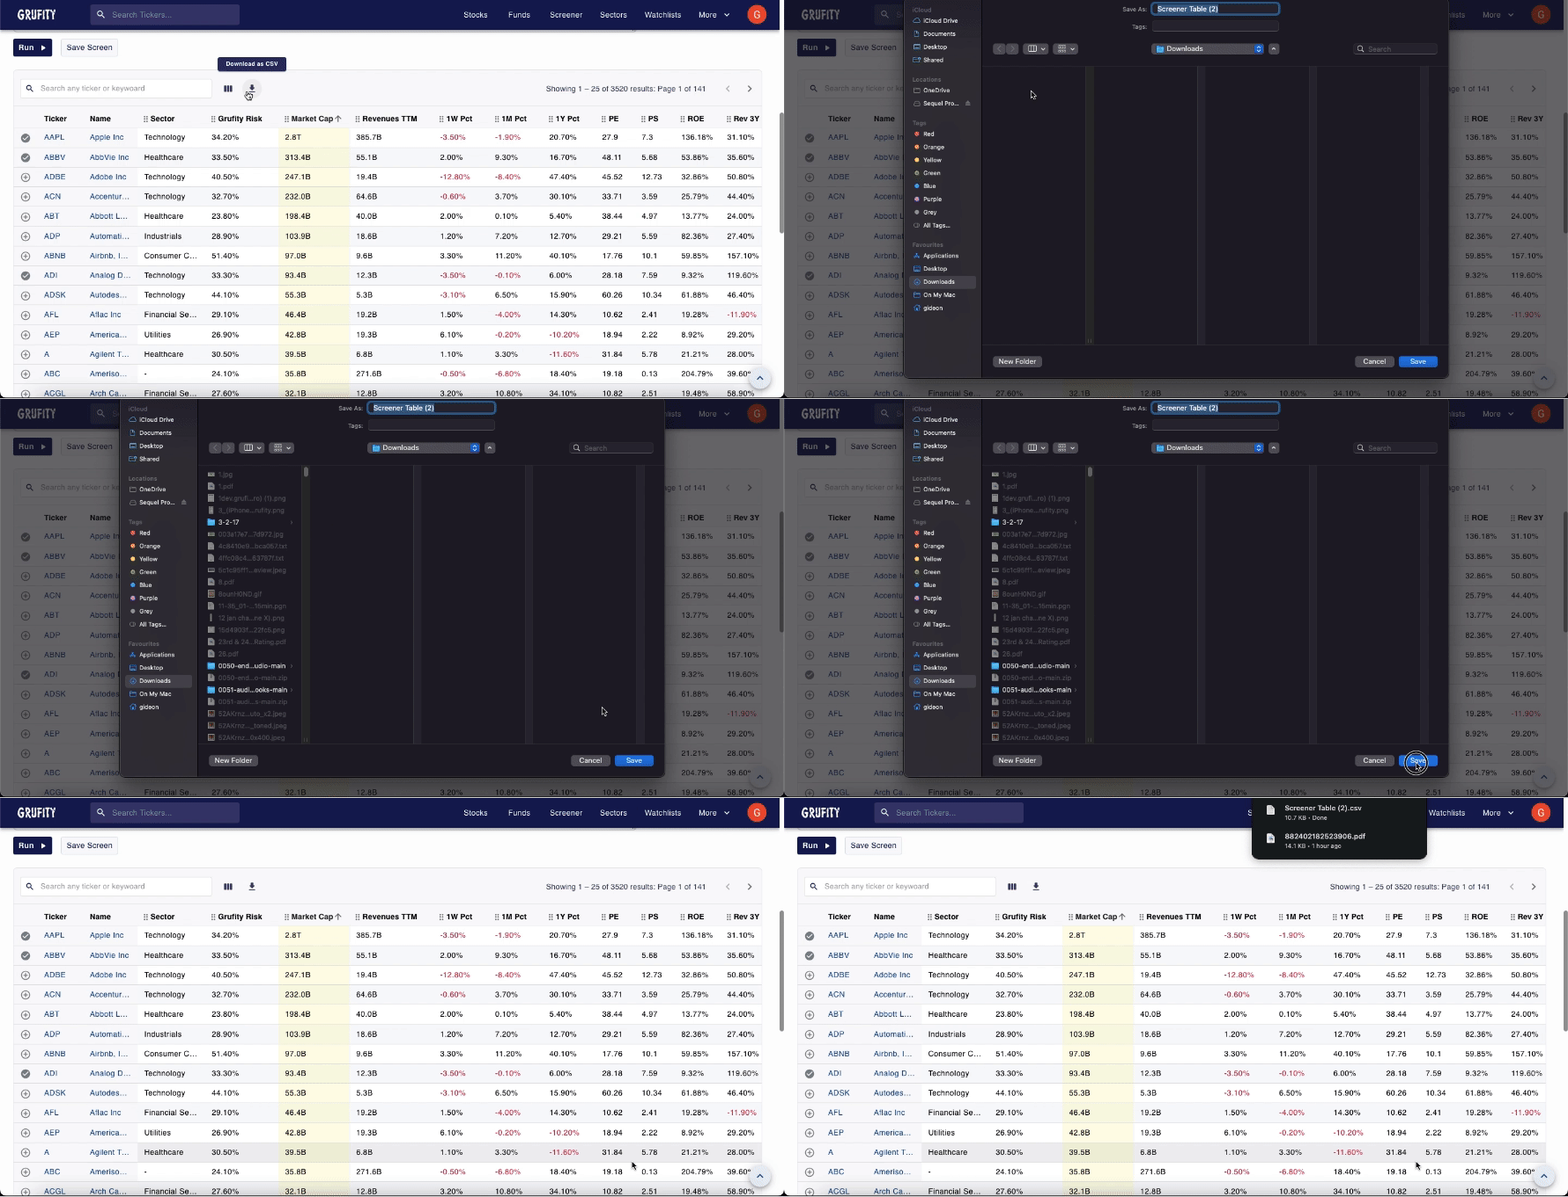
If you wish to export the screener as a CSV file, simply click on the "" button, and then you can rename the CSV file as needed.
Note: If you do not see the popup, please check your browser settings and ensure that popups are enabled for "Grufity" to avoid issues in the future.
Grufity is a website without advertisements, so you can adjust the popup settings for our site from "blocked" to "ask" without hesitation.
